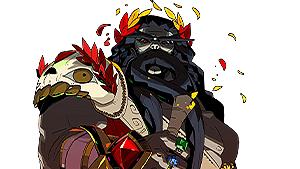
Walkthrough for Hades covers a systematic guide to progressing through the game and eventually clearing all of the game's Locations and discovering the entirety of its story. This guide will include information on some important items to acquire and important features to unlock and utilize in order to be able to go through all of the game's hurdles. This guide will also include important and notable NPC interactions, as well as all the Bosses you will encounter throughout the playthrough.
Hades Full Walkthrough Guide
Hades Biomes Navigation
Click to jump to a specific section of the page
Hades Tartarus Walkthrough
General Info
- Biome: Tartarus
NPCs Encountered
All Items
- Unknown God's Boon
- God's Boon
- Darkness
- Chthonic Key
- Gemstones
- Health
- Pom Slice
- Pom of Power
- Nectar
- Daedalus' Hammer
- Titan Blood
Tartarus Bosses
Tartarus Mini-Bosses
Enemies
- Numbskulls
- Skullomats
- Wringer
- Wretched Witches
- Wretched Thugs
- Wretched Louts
- Brimstone
- Wretched Pest
Tartarus Environment Guide
This level's rooms are usually large enough to move about in, square or rectangular in shape. They may, however, be rigged with traps that could harm you, but they could also work to your advantage.
Pillars
Stone Pillars for one, aren't exactly traps, but when an attack hits it, it will drop some debris that will potentially damage you.
Spikes
These are common traps in other games with the mechanic of spikes popping up when Zagreus steps on it. You can use these spikes to push enemies onto it for additional damage or lure them to it. These are avoidable by dashing through it.
Lion Tiles
Though they don't have openings for spikes to pass through, these are comparable to Spike Pads. Rather, these pressure pads trigger unique statuettes that aim attacks in the direction of the Pad.
Spiked Mines
These spiked items will act like land mines. When hit, they will explode in a circular motion.you can easily escape this by looking at the damage path its about to explode in.
Tartarus Unique Chambers
Each chamber will be different for each run. Sometimes you will have a chamber filled with enemies, while some have none at all but could have more materials and items to pick up. Sometimes you may come across chambers with unique NPCs that act as merchants to help you during your run.
Charon's Shop
Charon's Store may be found on every level and is identified by an icon that looks like a bag with a skull on it.
Charon's Store Items:
- Unknown God's Boon
- God's Boon
- Darkness
- Chthonic Key
- Gemstones
- Health
- Pom Slice
- Pom of Power
- Nectar
- Daedalus' Hammer
Sisyphus's Chamber
If you enter through the door with the exclamation point, you may find yourself in the room of Sisyphus, a large man seated behind two obstructed steps. Sisyphus will give you the option to choose between Darkness, Health, or Gold. The Shattered Shackle memento, which boosts damage caused from rubble that falls after hitting pillars, may be unlocked by giving him nectar once. To start his Favor quest, you can feed him nectar four more times.
Tartarus Mini-Bosses
For a detailed guide on these mini-bosses, check out the Enemies page for their description.
Dire Inferno Bombers
They are resistant, agile, and equipped with strong bombs that they use to attack targets from a distance. Since you'll be fighting them in a room with plenty of space between the four pillars and the central platform, both of which are cluttered with traps, the trick is to draw them and their attacks to a spot where you can reach them and use your reach to hit them. Repeat this a few times, but take caution they also release a bomb when they die.
Doomstone
The Doomstone is a hovering crystal that shoots stationary lasers in multiple directions. It is very simple to dodge and get away from the lasers. But as you fight it, it will continue to drop these immobile bits, which will keep moving about the room and, should they detect any of the Doomstone's lasers, link up to move together and provide a real threat.
Wretched Sneak
The Wretched Sneak awaits you in a large, L-shaped room with a central pillar. With its three attack patterns—teleporting around the room, firing a barrage of fast magic projectiles in your general direction, and trying a melee attack if it's next to you—the Wretched Sneak is arguably the hardest of all the Tartarus mini-bosses. Other than that, it can call in additional help.
Tartarus Bosses - Megaera, Alecto, and Tisiphone
For a detailed guide on how to defeat the three bosses of Tartarus, check out the Bosses page.
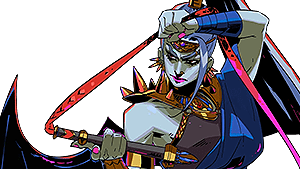
Megaera
Megaera is a semi-fast boss. She can be quick, but sometimes takes time to execute her attacks. The majority of her attacks are ranged so it would be a bit difficult to approach her with melee attacks. To damage Megaera more, you'll have to play her own game as well which is to use your ranged attacks and casts. If you ever get a window to attack her using melee attacks, take that chance for more damage. When her HP drains to 75%, her Fire and Multiple Blast attacks unlock.
These attacks consist of power-full ranged attacks that are hard to dodge. Megaera also summons thugs and witches to help her defeat you, which starts at 75% HP. Once you drain her to 50% and 25%, the summons will double and also make her invulnerable for a short time. The key here is to utilize your ranged attacks after every attack that she does. At low health, after her invulnerability wores off, take this time to try and finish her off.
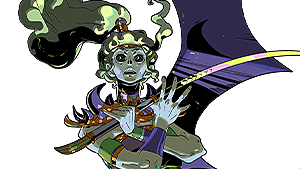
Alecto
Alecto is a speedy boss in Hades. One of her deadliest and most common attacks is when she's going to dash towards Zagreus. Watch her movements carefully and be ready to dodge or dash yourself when she moves. She becomes stationary for a bit after the dash, so, take this opportunity to damage her. You'll also have to watch out for her spinning spikes. This attack has her casting a bunch of spikes that ricochet off the all. until it disappears.
Use your dash to dodge these attacks. At 50-25% health, her rage meter will start to fill up more often and when her hp reaches 10%, this is when her rage meter stays permanent. This will cause her attacks to become more powerful and faster. During these stages, the best possible way to finish her off is to use your casts. Use your normal short attacks when you get a window until she eventually dies.
Tisiphone
Tisiphone is a surprisingly fast boss in Hades. Due to her quickness, attacking her with range would prove to be a challenging course of direction. The best way to combat her is by using melee attacks. Tisiphone usually pauses after each combo attack that she does, so when you see that opening, charge toward her and bombard her with attacks. You can also try to run towards her while she's releasing projectiles since she's stationary in that state and the projectiles are quite slow.
When she's about to lunge at you, she pauses for about a second before she does. Given this, this would be your cue to dodge her and start countering. She uses a lot of space for her attacks so, it becomes more difficult when her hp drains because the walls start closing in at 5-% health and 25% health.
Hades Asphodel Walkthrough
General Info
- Biome: Asphodel
NPCs Encountered
All Items
- Unknown God's Boon
- God's Boon
- Darkness
- Chthonic Key
- Gemstones
- Health
- Pom Slice
- Pom of Power
- Nectar
- Daedalus' Hammer
- Centaur Heart
- Diamond
Asphodel Bosses
Asphodel Mini-Bosses
Enemies
- Bloodless
- Bone-Raker
- Inferno Bomber
- Wave Maker
- Burn Flinger
- Slam Dancer
- Brimstone
- Numbskull
- Spreader
- Voidstone
- Skull Crusher
- Gorgon
- Dracon
Asphodel Environment Guide
This level's room is surrounded by lava and small islands. Falling into the lava can damage Zagreus but you can also use it to your advantage to lure enemies in. The traps that this biome contains is are:
Skeleton Pillars
Skeleton Pillars for one, aren't exactly traps, but when an attack hits it, it will drop some debris that will potentially damage you. They are similar to what Stone Pillars do in the Tartarus Biome
Spikes
These are common traps in other games with the mechanic of spikes popping up when Zagreus steps on it. You can use these spikes to push enemies onto it for additional damage or lure them to it. These are avoidable by dashing through it.
Magma
In addition to hurting Zagreus after a few seconds, the lava in this biome can also shoot fireballs close to the coast. The region of effect will become visible to you prior to the fireball touching down.
Asphodel Unique Chambers
Each chamber will be different for each run. Sometimes you will have a chamber filled with enemies, while some have none at all but could have more materials and items to pick up. Sometimes you may come across chambers with unique NPCs that act as merchants to help you during your run.
Charon's Shop
Charon's Store may be found on every level and is identified by an icon that looks like a bag with a skull on it.
Charon's Store Items:
- Unknown God's Boon
- God's Boon
- Darkness
- Chthonic Key
- Gemstones
- Health
- Pom Slice
- Pom of Power
- Nectar
- Daedalus' Hammer
- Centaur Heart
Eurydice's Chamber
You may find yourself in Eurydice's chamber if you board a boat designated with an exclamation point. This will be evident to you as soon as you go in since there will be a woman singing. Eurydice will let have have one of these:
Asphodel Mini-Bosses
For a detailed guide on these mini-bosses, check out the Enemies page for their description.
Megagorgon
There is a Megagorgon and a Dire Skullcrusher in this mini-boss fight. Zagreus can be terrified by the sluggish, homing bullets fired by the Megagorgon on a constant basis. Zagreus is usually terrified by the Megagorgon while the Skullcrusher slams into him. If not used properly, this combination can be fatal.
Asphodel Boss - Bone Hydra
For a detailed guide on how to defeat the three bosses of Tartarus, check out the Bosses page.
Take advantage of this opportunity to begin studying the time between attacks as the main head will begin executing them in a random order. A ground slam may occur once, but as the fight progresses into the second half, you may anticipate three or five of them. Other heads will start to appear around the arena once you've taken it down to just over 25% of its Health. Though they are all comparable attacks, timing them all will undoubtedly be more challenging. There will be occasions when two heads will be near enough to damage Zagreus simultaneously, and other times when you need to anticipate strikes from the main head and smaller heads.
After eliminating them, they proceeded to launch another attack on the Hydra. There will be more heads, but in larger quantities, after you reach the second and last part of its life. Keep your attention on them and watch out for other enemies that may get in the way. Expect the Hydra to be more aggressive at this point, so by now, all of the adjustments have been enhanced. Furthermore, exercise caution when avoiding areas outside of the arena, as prolonged exposure to the lava will damage you.
Hades Elysium Walkthrough
General Info
- Biome: Elysium
NPCs Encountered
All Items
- Unknown God's Boon
- God's Boon
- Darkness
- Chthonic Key
- Gemstones
- Health
- Pom Slice
- Pom of Power
- Nectar
- Daedalus' Hammer
- Centaur Heart
- Diamond
Elysium Bosses
Elysium Mini-Bosses
- None
Enemies
- Splitter
- Nemean Chariot
- Flame Wheel
- Voidstone
- Brightsword
- Longspear
- Strongbow
- Greatshield
- Soul Catcher
Elysium Environment Guide
This level's rooms are surprisingly large, despite being cluttered with objects and obstructions. The Traps here are easier to spot:
Phoenix Pillars
Phenix for one, aren't exactly traps, but when an attack hits it, it will drop some debris that will potentially damage you. They are similar to what Stone Pillars and Skeleton Pillars do but they can regenerate after being destroyed.
Phenix Land Mines
These are very similar to the spike traps in other games with the mechanic of spikes popping up when Zagreus steps on it. You can use these land mines to push enemies onto it for additional damage or lure them to it. These are avoidable by dashing through it.
Lancer Statues
When a statue of a lancer comes close, it instantly reacts and assumes an attack position that causes a lot of damage. Instead of standing next to them, try pushing adversaries in the direction of their location.
Elysium Unique Chambers
Each chamber will be different for each run. Sometimes you will have a chamber filled with enemies, while some have none at all but could have more materials and items to pick up. Sometimes you may come across chambers with unique NPCs that act as merchants to help you during your run.
Charon's Shop
Charon's Store may be found on every level and is identified by an icon that looks like a bag with a skull on it.
Charon's Store Items:
- Unknown God's Boon
- God's Boon
- Darkness
- Chthonic Key
- Gemstones
- Health
- Pom Slice
- Pom of Power
- Nectar
- Daedalus' Hammer
- Centaur Heart
Patroclus' Chamber
If you enter through a door with an exclamation point, you may find yourself in Patroclus's chamber. When you first meet him, he's a sullen man sitting in the middle of the room, refusing to give you his name. Read his entry in your Codex to truly understand his name. He'll offer some items to you. Give him some nectar after you've figured out his name, and Patroclus will give you the Broken Spearpoint in return. In the House of Hades' training room, you can equip the Broken Spearpoint, a keepsake. After suffering damage, Zagreus will gain a moment of invincibility from the Broken Spearpoint, shielding him from being struck and knocked back repeatedly.
- Kiss of Styx Premium
- HydraLite Gold
- Cyclops Jerky
Elysium Mini-Bosses
For a detailed guide on these mini-bosses, check out the Enemies page for their description.
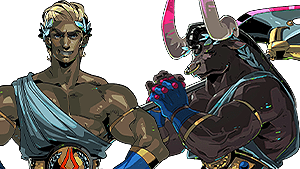
Elysium Boss - Asterius and Theseus
For a detailed guide on how to defeat the three bosses of Tartarus, check out the Bosses page.
This is one of the most difficult boss fights that you can encounter due to it being a 2-1 situation. Asterius will be the melee character of the duo while Theseus will stay back the majority of the time to throw his spear at you. The best way to approach this is to take out the muscle first which is Asterius. You'll have to have an extra eye on Theseus since majority of the time, he'll be throwing his spear at you. When fighting Asterius, the walls and pillars are your best friends here. When he does a charge, he'll usually pause for a moment, giving you ample time to position yourself. Position yourself behind a wall or pillar then dodge when Asterius charges.
When he hits one of these, this will stun him and will give you ample time to damage him. At times that you're stunned and near Theseus, you can also give him some damage since all he does is spin toward you when you get near. Just keep repeating this process until One of them falls. Do take note that if Asterius reaches low health and crashes on a wall or pillar, a wave that can damage you emerges from his back. Theseus on the other hand in low health may summon an Olympian God to aid him. He will only summon Gods that have not given you any Boons. Do take note that Theseus never summons Hermes.
Hades Temple of Styx Walkthrough
General Info
- Biome: Temple of Styx
NPCs Encountered
All Items
- Unknown God's Boon
- God's Boon
- Darkness
- Chthonic Key
- Gemstones
- Health
- Pom Slice
- Pom of Power
- Nectar
- Daedalus' Hammer
- Centaur Heart
- Diamond
Temple of Styx Bosses
Temple of Styx Mini-Bosses
Enemies
- Bloodless
- Bone-Raker
- Inferno Bomber
- Wave Maker
- Burn Flinger
- Slam Dancer
- Brimstone
- Numbskull
- Spreader
- Voidstone
- Skull Crusher
- Gorgon
- Dracon
Temple of Styx Environment Guide
The Styx is the final biome (in the present version of the game) that players will meet in Hades, and it functions very differently from the other levels. Once inside, you'll see that Cerberus has blocked the road that leads directly out. Luckily, Cerberus is friends with Zagreus, so you can buy him a little something to get through. The Satyr Sack is hidden behind a randomly chosen chamber, out of a total of five. This implies that discovering it is entirely random; it may appear in your second chamber or your final chamber, depending on when it does. But the first route you take is configured to have no Satyr Sack at the end of it. Furthermore, there is a certainty that two of the feasible routes will ultimately lead to a mini-boss. Entering each chamber consists of following a series of little passages that eventually lead to a large room that might or might not hold the Satyr Sack. Here are the traps of these chambers:
Guillotine
A massive axe that hits the ground and deals a lot of damage. Take care where you walk because some are timed, while others can be tied to a floor tile. Drawing adversaries upon them is quite helpful.
Saw
On occasion, you may notice statues on the walls that resemble snakes. Their jaws release enormous circular saws. The saws cut through everything in their path as they travel in a straight line. Fortunately, a collision can deflect them.
Poisonous Vents
Because they are buried in the ground, they are more difficult to notice when you are engaged in combat. They are poison vents, as the name implies, occasionally releasing poison gas. Zagreus is constantly losing health and is susceptible to stacking from Styx Poison. Fortunately, there is a Mandragora Fountain in every chamber that you may use to cure Zagreus of the status condition.
Temple of Styx Unique Chambers
Each chamber will be different for each run. Sometimes you will have a chamber filled with enemies, while some have none at all but could have more materials and items to pick up. Sometimes you may come across chambers with unique NPCs that act as merchants to help you during your run.
Charon's Shop
Charon's Store may be found on every level and is identified by an icon that looks like a bag with a skull on it.
Charon's Store Items:
- Unknown God's Boon
- God's Boon
- Darkness
- Chthonic Key
- Gemstones
- Health
- Pom Slice
- Pom of Power
- Nectar
- Daedalus' Hammer
- Centaur Heart
Temple of Styx Mini-Bosses
For a detailed guide on these mini-bosses, check out the Enemies page for their description.
Gigantic Vermin
This Gigantic Vermin can attack by spit poison pools from a distance, unlike the normal ones.
Bother
The Bother mini-boss surrounds itself with a ring of explosives.
Snakestone
Up to four continuous lasers can be fired by this Snakestone variation while it hovers over a gap in the middle of the chamber. Zagreus will have to go in circles to avoid the saw traps, lasers, and other adversaries. To make it simpler to overcome the Snakestone, it can be pushed toward and away from the chasm's edge.
Satyr Cultist
This Satyr Cultist is different from the ordinary one in that it has numerous venomous darts. There will be a lot of crawler foes, and it's advised to destroy the Satyr Cultist. You can move back and attack from a distance as long as you're hitting the Satyr Cultist if your attacks have an area of effect damage.
Temple of Styx Boss - Hades
For a detailed guide on how to defeat the three bosses of Tartarus, check out the Bosses page.
Because Hades has two stages, unlike the previous bosses, you will have to empty his full health bar twice rather than seeing an increase or diversity of attacks while he's at 50% HP. He'll be using his axe all the time, and you can know when he's going to swing by the visual cue. If you're close, be ready for at least two attacks and be ready to dash across or away from him. Occasionally, he may also sprint in Zagreus' direction, doing a great number of damage and coming close enough to launch additional attacks. He is a quick and unrelenting foe, and that trait serves him well over the whole fight.
He will become unaffected by damage and call upon opponents in the arena to assist him at least twice in the first phase. This is quite frustrating because these normally have armor, and while you're at it, Hades will keep attacking. He's probably going to throw more skulls as well. These may appear innocuous, but the shockwave they produce is powerful, and swift, and can seriously damage your health. You shouldn't bother getting near skulls if you know you won't be able to destroy them in time because they will probably explode and hit you almost immediately. Instead, hold your position and get ready to dodge.
You need to be extra cautious around the jars he will call forth in the last stage. Zagreus will be stunned and frozen in place once these are broken. It's important to keep in mind that their explosions affect a larger area than simply the area where the object is located. You can take advantage of the fact that Hades' spear has the ability to shatter them. Last but not least, although the two circles-shaped objects have a purpose, the laser beams are extremely frightening. You can be sure that Hades is going to attack when you see him spinning his spear on his hands while they are still in position. To avoid getting hit, simply hide behind one of them.

